


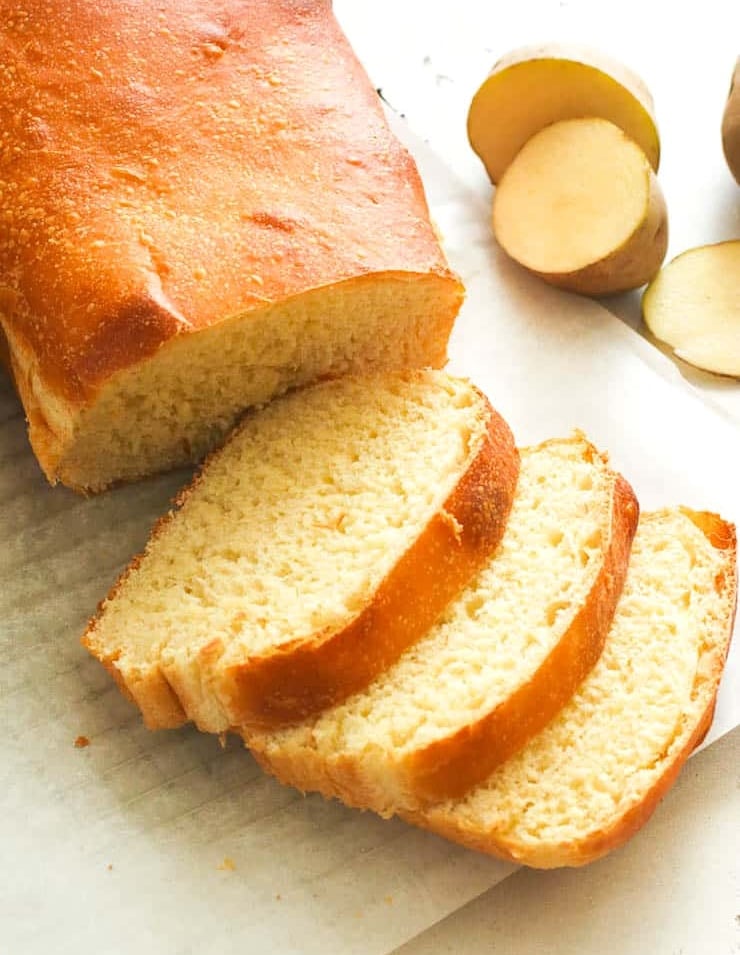
Potato bread is soft, flavorful, and loaded with more nutrients than regular white bread. Take a deep breath of the addictive aroma of fresh baking bread, and get ready to ramp up your average toast and sandwiches.
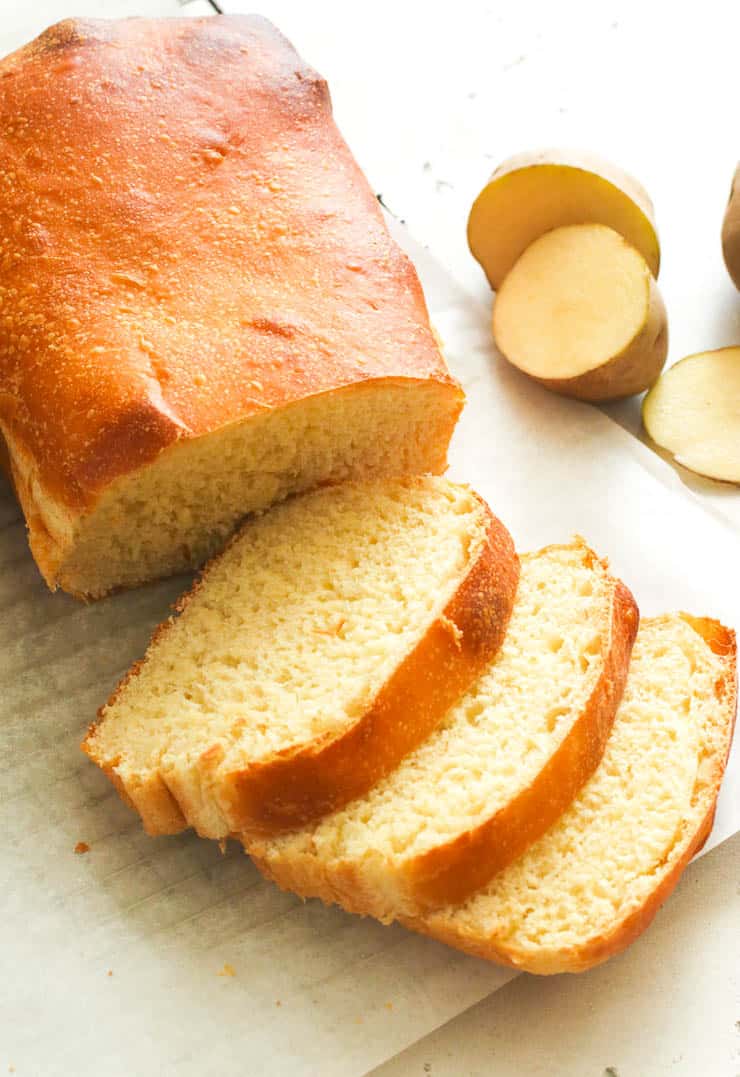
I was a little doubtful the first time a friend told me how good potato bread is. But curiosity got the best of me, so I went searching for the best recipe I could find. Wow! It was soft with a subtle yet addictive flavor.
So I started making sandwiches, toasted it for breakfast, and slathered it with butter and jam. It was the new love of my life, right after my family.

Why Make Bread With Potatoes
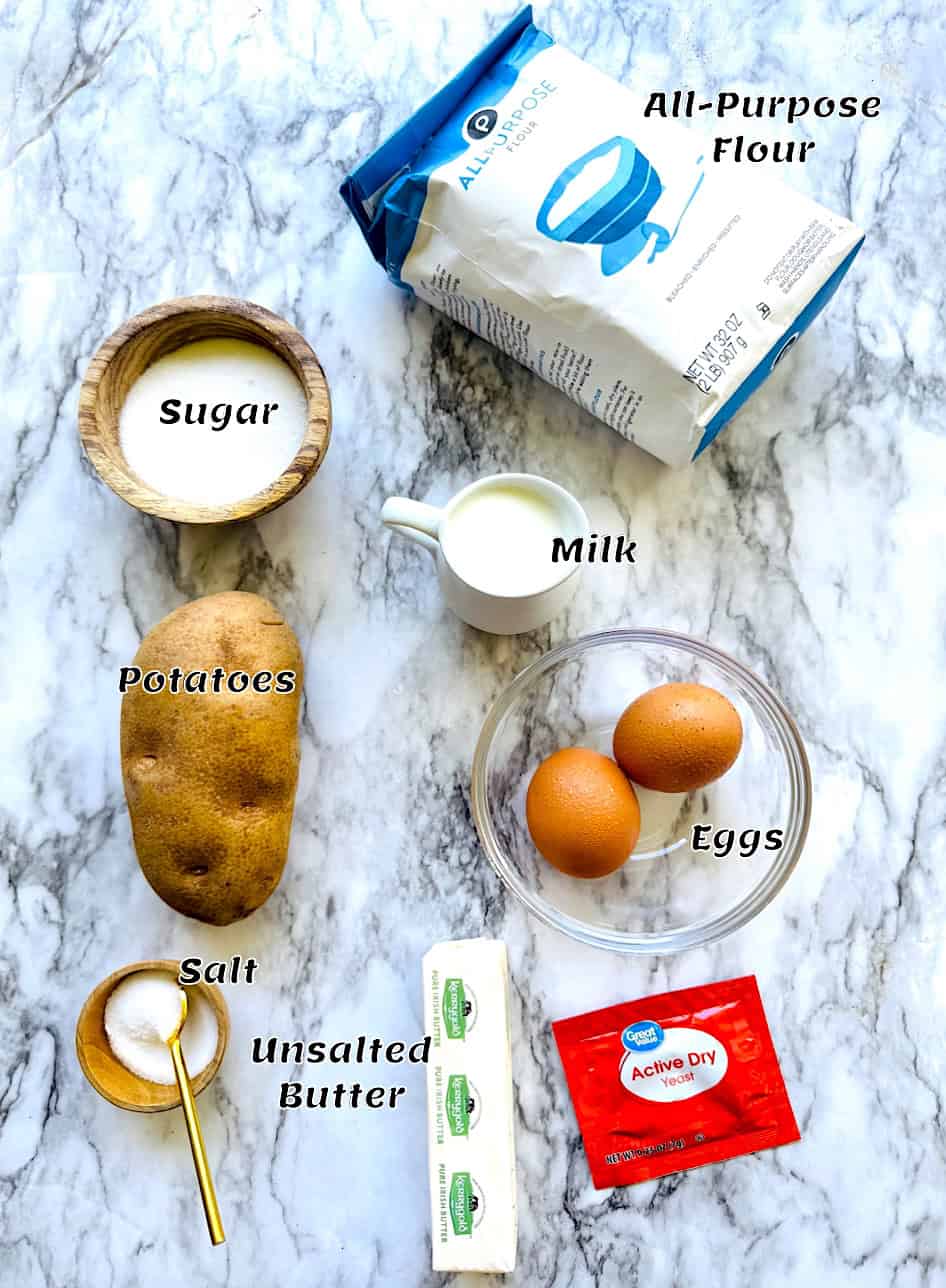
Thanks to a wheat shortage in the 1700s, bakers experimented with how they could make soft white bread and stretch a rare commodity. Not only was it more economical, but it also had more fiber and was softer than regular white bread. While 100% potato doesn’t make good bread, a ratio of 1 cup of mashed potatoes to 5 cups of flour delivers fantastic results.
How to Make Potato Bread
If you don’t already have leftover mashed potatoes, go ahead and cook some up. Don’t let all the steps scare you; this recipe is super easy.
Mashed Potatoes
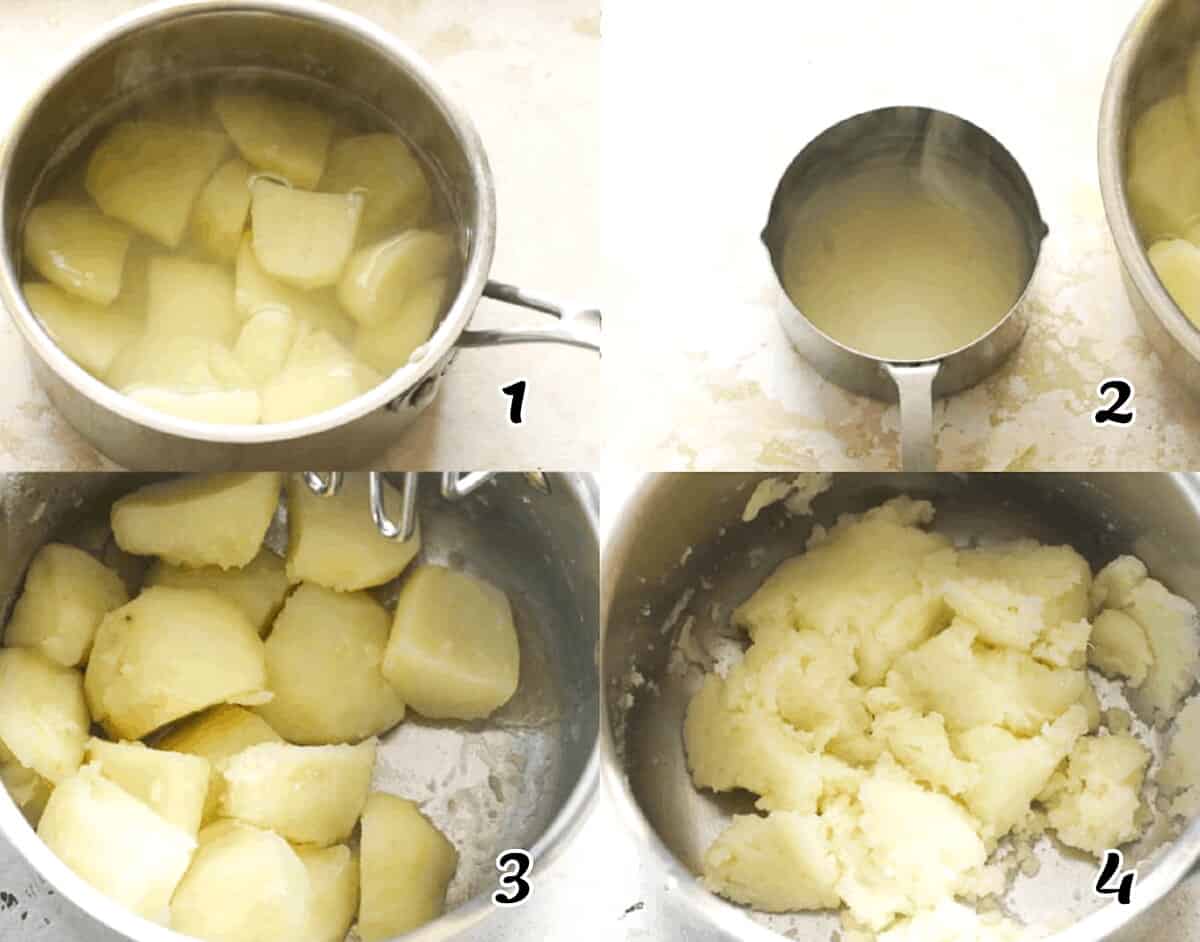
- Peel and cut the potatoes into chunks and put them in a medium saucepan. Cover them with enough water to cover by at least an inch.
- Cook until tender, about 10 minutes. Drain potatoes and reserve about ⅔ cup of the water. Mash them and set them aside to cool. (Photos 1-4)
The Dough
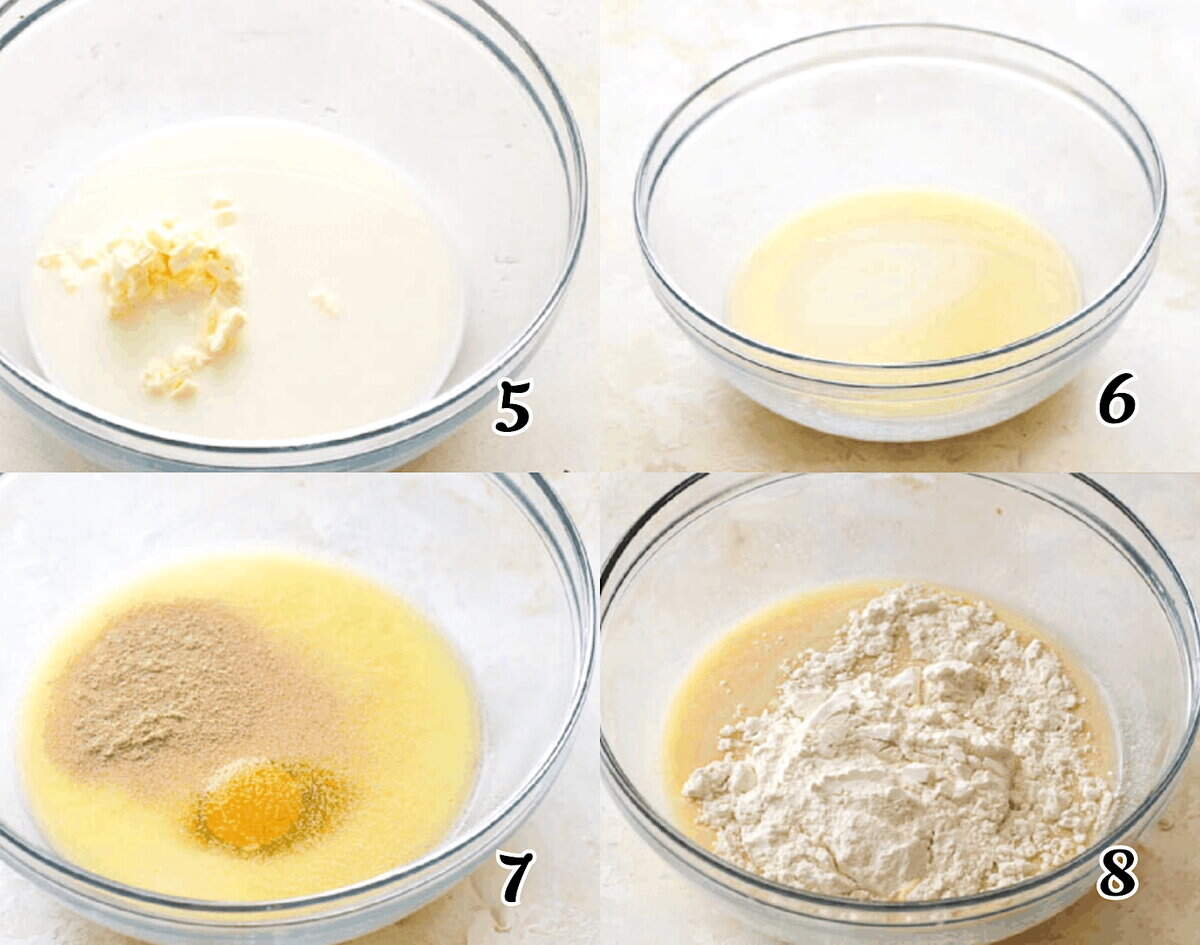
- Combine – Meanwhile, in a medium microwave-safe bowl, stir the milk, butter, sugar, and salt. Microwave it for about a minute, and stir until everything melts. (Photo 5)
- Liquids – Add the reserved potato water. If the mixture is too hot, let it cool enough not to kill the yeast and curdle the egg. (Photo 7)
- Transfer the mixture to a large bowl or stand mixer. Add the instant yeast and egg and whisk until thoroughly combined. (Photo 7)
- Dough – Add the mashed potatoes and continue mixing. Next, add the all-purpose flour a cup at a time. Add just enough flour to make a soft dough. (Photos 8-9)
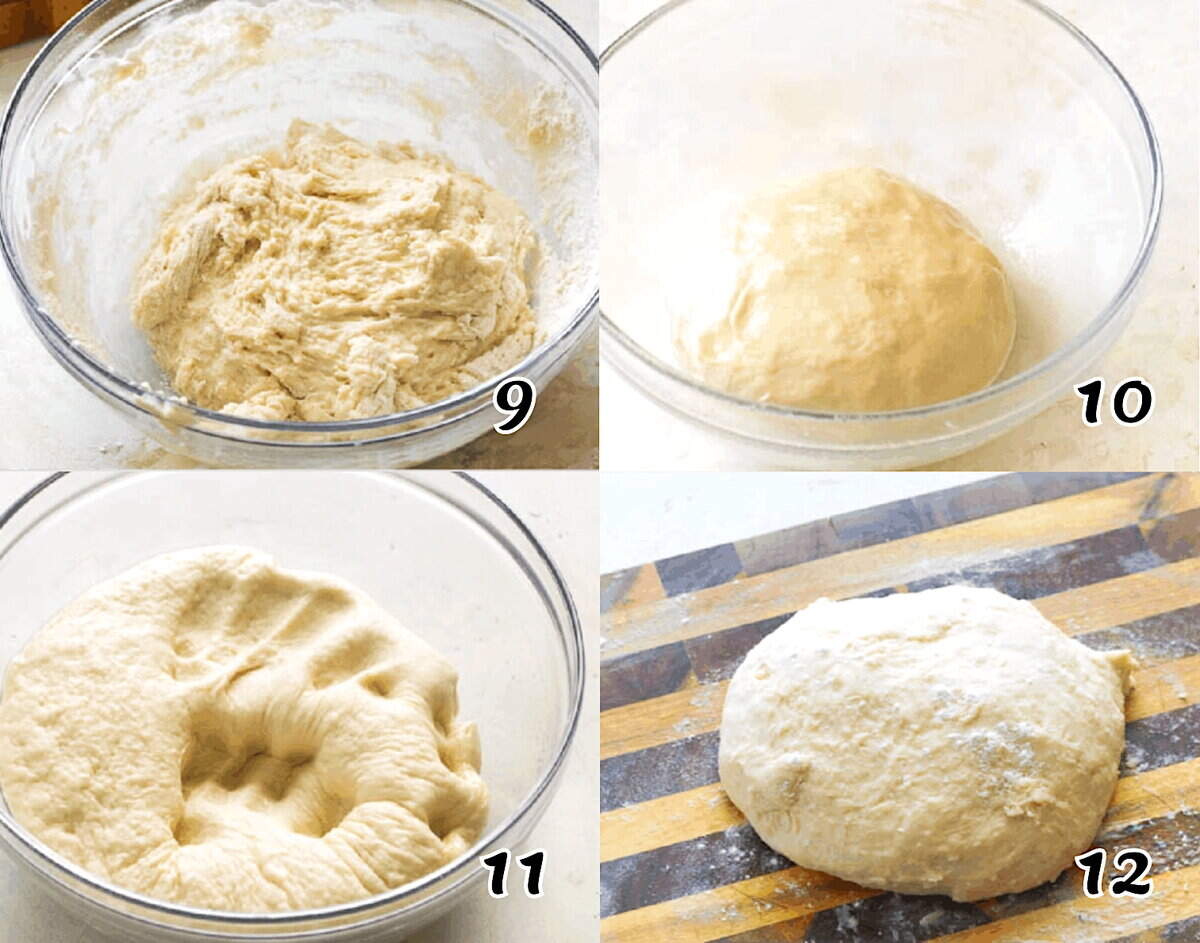
- Knead – Transfer the dough to a lightly floured surface and knead for 6-8 minutes.
- Rise – Place the dough in a greased bowl, turning once to coat the dough with oil. Cover loosely with a clean cloth and let it rise in a warm place for 1½ to 2 hours or until doubled in size. (Photo 10)
The Bread
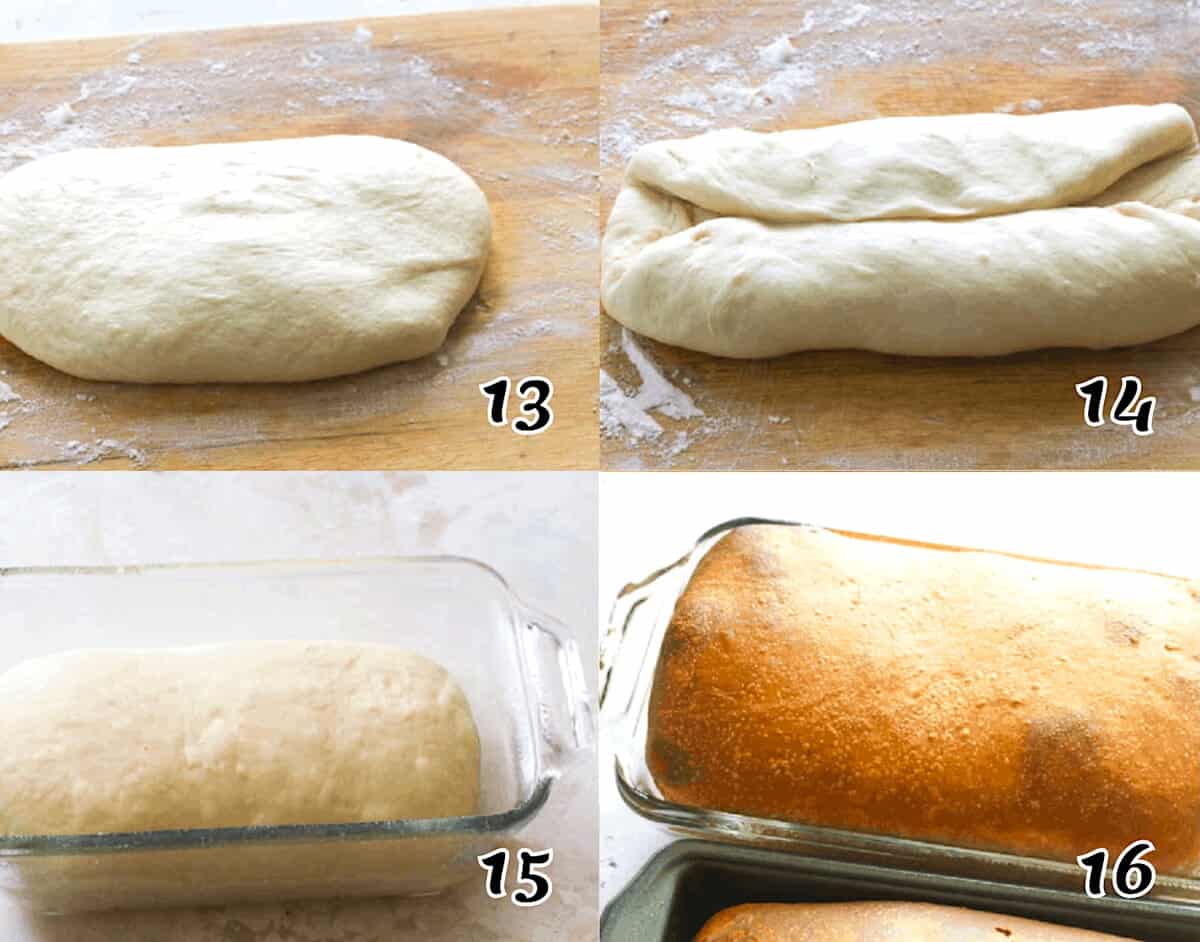
- Punch the dough down and divide it in half. Knead and flatten one half into a rectangle, then fold in thirds on top of itself. Fold the bottom third over it so that it overlaps the other layer. (Photos 11-14)
- Pinch the dough to seal where the layers meet to close it up. Repeat with the other half.
- Loaves – Lift both loaves and place them into two greased 9″×5″ loaf pans. Allow them to rise for about 30 minutes or until the dough has risen an inch above the pans. (Photo 15)
- Bake at 350℉ (175℃) for 30-40 minutes. If the bread browns too fast, tent it with foil paper. You can check for doneness with an instant-read thermometer. It should read 195-200°F (90-95℃) when inserted into the center of the bread. (Photo 16)
- Serve – Take the bread out of the oven and transfer it to a rack. Let them cool before slicing. Spread it with butter, and enjoy!
Recipe Tips and Notes
- Make sure the hot liquids have cooled to at least 105℉ (40℃) so it doesn’t kill the yeast.
- Stretch and knead your dough to develop the gluten. The dough will become smooth and pull away from the sides of the bowl. Besides, kneading is good therapy.
- Be patient and let the bread rise long enough to double in size for light, fluffy bread.
- Feel free to use a bread machine for this recipe. Just follow the manufacturer’s instructions and enjoy.
Storing and Make-Ahead Instructions
While I can eat the whole loaf hot out of the oven, it’s not the smartest thing to do. Good thing you can keep it in an airtight container at room temperature for a couple of days or in the fridge for a week. It also freezes well for 2-3 months.
Sometimes, I make the dough ahead and let it ferment in the fridge for a few days. Two to three days will allow that wonderful yeasty flavor to develop without destroying the gluten’s structure. Then, bring the dough to room temperature, knead and form the loaf, and let it rise before baking.
How to Use Homemade Potato Bread
This homemade bread makes egg salad, tomato, and grilled cheese sandwiches that much better. You can even make rolls and hoagie buns with the dough instead of a loaf for chicken salad and steak and pepper sandwiches.
More Homemade Yeasted Bread Recipes
Watch How to Make It
[adthrive-in-post-video-player video-id=”crCorEem” upload-date=”2020-10-09T06:00:00.000Z” name=”Potato Bread” description=”Fluffy, flavorful, and fully loaded with nutrients, complete your breakfast with this easy to make POTATO BREAD. This baked goodie is a tastier alternative to your regular white bread.” player-type=”collapse” override-embed=”false”]
This blog post was originally published in April 2021 and has been updated with additional tips, new photos, and a video.
Leave a Reply