


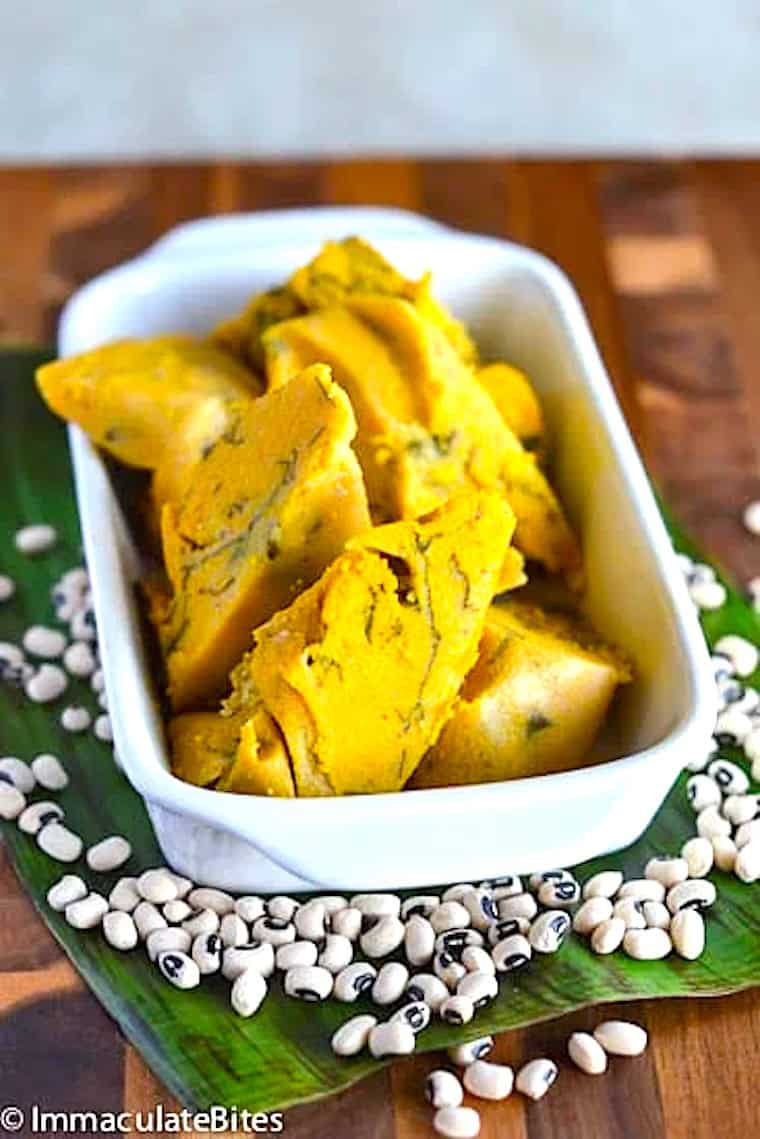
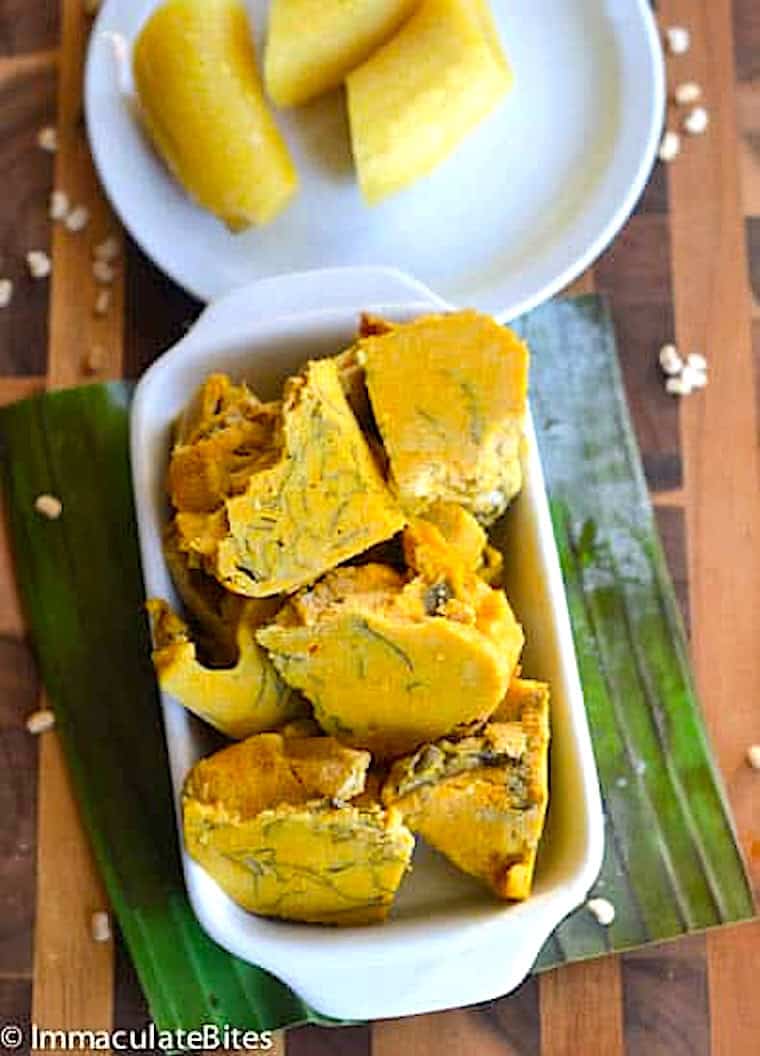
Koki beans are a moist, tasty, pudding-like, steamed treat made with coarsely ground black-eyed peas and some spinach. Great as a meal on its own or with boiled plantains!
Did you know black-eyed peas are native to West Africa? People have enjoyed them for thousands of years throughout the continent. They’re believed to have reached the United States during the transatlantic slave trade. No wonder it’s so popular in the South, especially with African Americans.
While growing up in West Africa, specifically Cameroon, I never had these beans whole. They always masqueraded in pudding form and under interesting aliases: koki beans, ekoki, haricots koki, koki de niébé, gateau de haricots, or bean cakes. You can find these delectable bites everywhere in Cameroon, as they’re popular in restaurants and bars. They’re also a popular street food sold by women vendors to hungry pedestrians, myself included.
Honestly, some of the best koki beans I’ve had the pleasure of eating have been from these street vendors. They sure know how to get the consistency right, spot on, moist, and tasty. Besides, it’s a whole lot faster to buy them on the street.

Why They’re Worth the Effort
So why is this bean pudding not cooked frequently? Because it can be time-consuming: soaking, washing, peeling, grinding, pounding (whisking), and assembling the koki beans is no easy task.
However, there are ways to cut down on this process. Using peeled beans sold in African stores will cut your time in half. And since they freeze well, you can wash and peel a big batch of beans when you have time, and freeze them until the day of.
How to Make Koki Beans
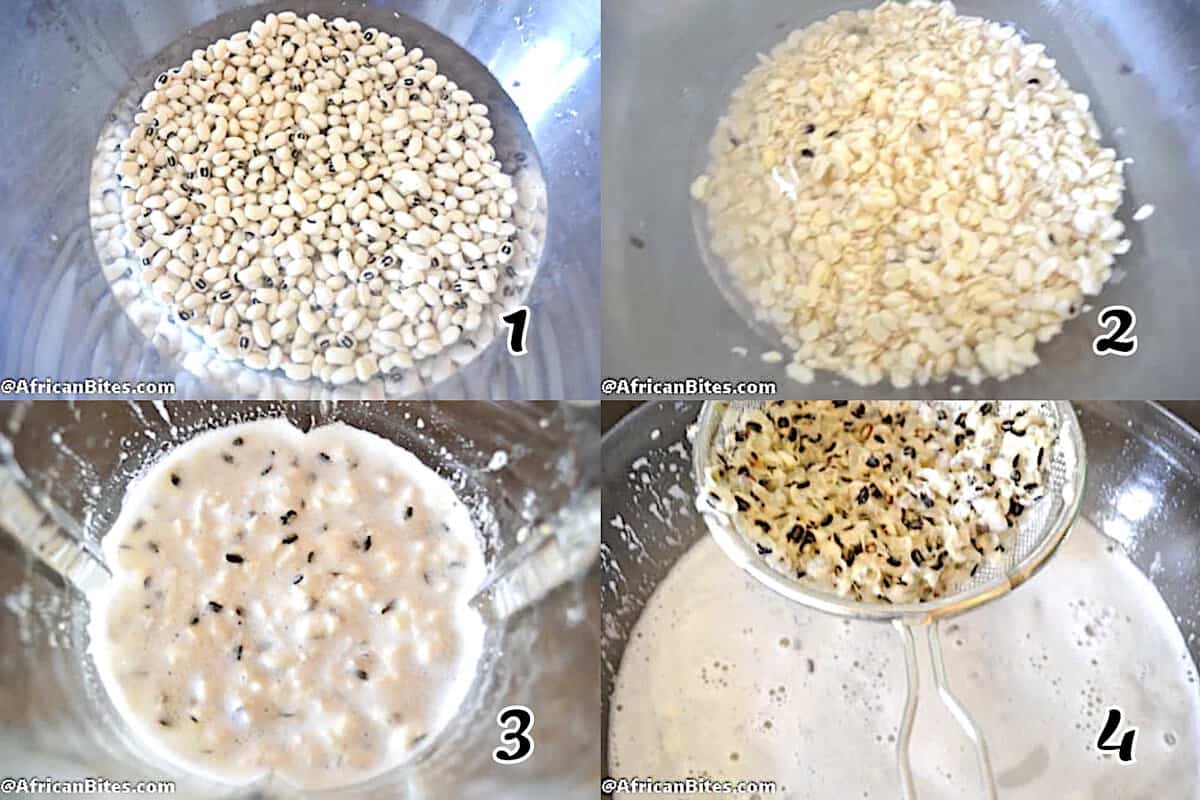
- Peel the black-eyed peas or buy pre-peeled beans. (Photos 1-4)
- Soak peeled beans in water for about an hour to overnight to completely hydrate them and facilitate blending.
- Cut the banana leaves into rectangles, remove any ugly edges, submerge them in water to clean, drain, and pat them dry. Parchment paper works if banana leaves aren’t available.
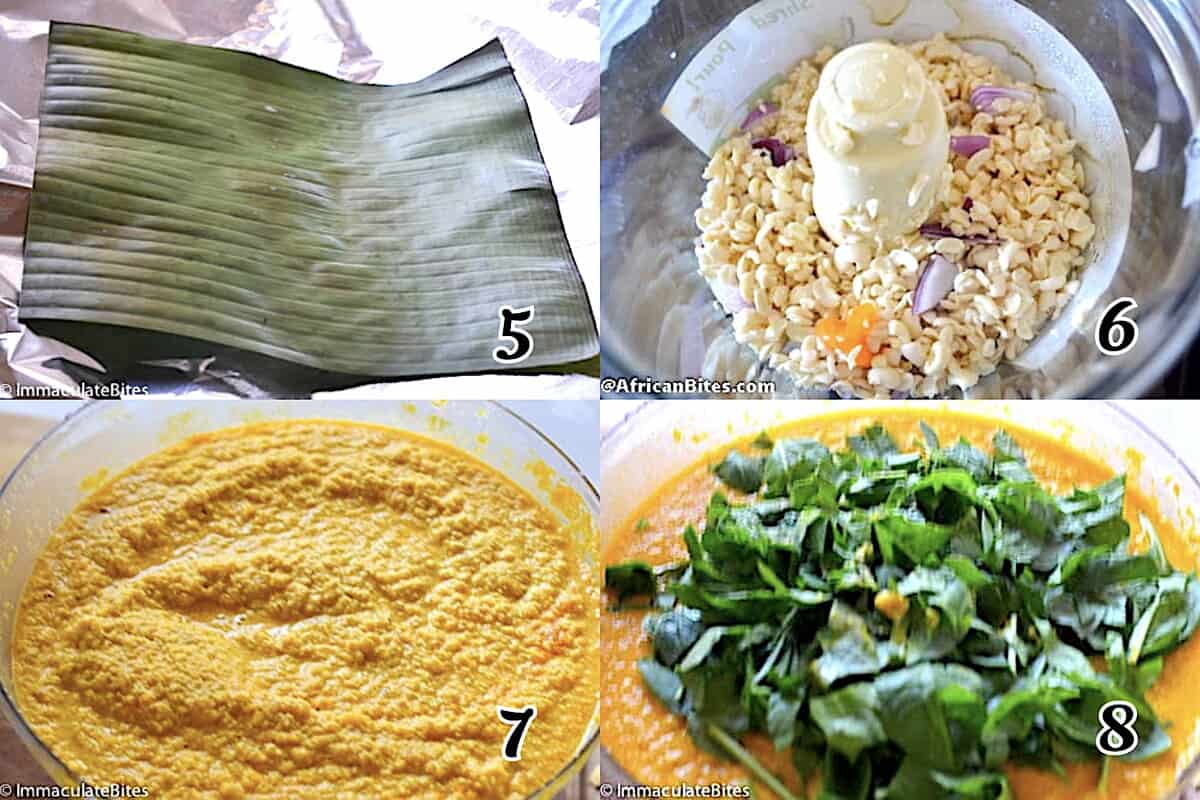
- Heat the leaves and wilt them over an open high flame to make them flexible. Then place them on 6 pieces of aluminum foil cut large enough to wrap the finished koki, and set aside. (Photo 5)
- Chop onions and habanero, and set aside.
- Oil – Lightly warm palm oil in a small skillet or saucepan for about a minute or two until completely melted.
- Puree the beans, onions, and habanero pepper in a food processor or blender, with a cup of water or more, until it reaches the desired consistency. (Photo 6)
- Pour the mixture into a large bowl, and add the palm oil and spinach. Mix everything, then season to taste with Maggie or bouillon and salt. Make sure to use up all the water. (Photos 7-8)
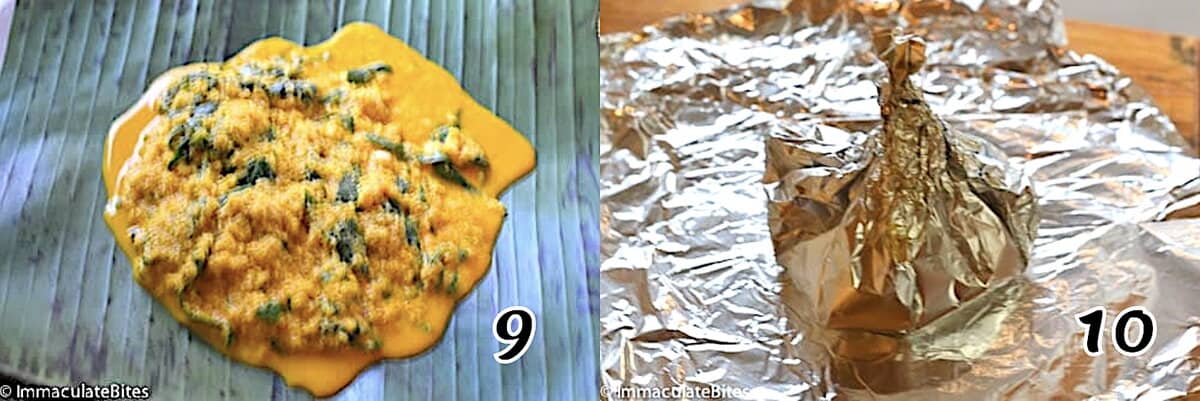
- Assemble – Place a scoop of koki bean mixture on a leaf (about 2 cups). Fold the banana leaves to form a little purse, then fold the aluminum foil around it, and set aside while you repeat the process until all the kokis are assembled. (Photos 9-10)
- Prep – Line the bottom of a large stockpot with aluminum foil or the remaining leaves or stalks to create a steamer (or use a real steamer). Add enough water to steam.
- Steam koki for about an hour and 30 minutes, adding water as necessary to prevent burning.
- Serve – Remove and let them cool for about 10 minutes. Enjoy.

Tips and Tricks
- Don’t grind your beans into a fine paste. They must be coarsely ground, a little bit gritty (this makes a huge difference).
- Include onions for flavor.
- Red oil (NOT the controversial palm oil) makes a moist koki. However, I use half the oil asked for because, you guessed right, calories. I would rather eat more than less, and it doesn’t make them less appetizing.
- You can use plantain or banana leaves if you have them, but they’re not necessary. You can wrap them in parchment paper or aluminum foil.
What to Serve With Koki Beans
Serve this with any starchy side. My favorite is boiled ripe plantains. Baked plantains, potatoes, pounded yams, and yuca are also great.
More Satisfying Street Food Recipes to Try
By Imma
This blog post was originally published in November 2013 and has been updated with additional tips and beautiful photos.

Leave a Reply