


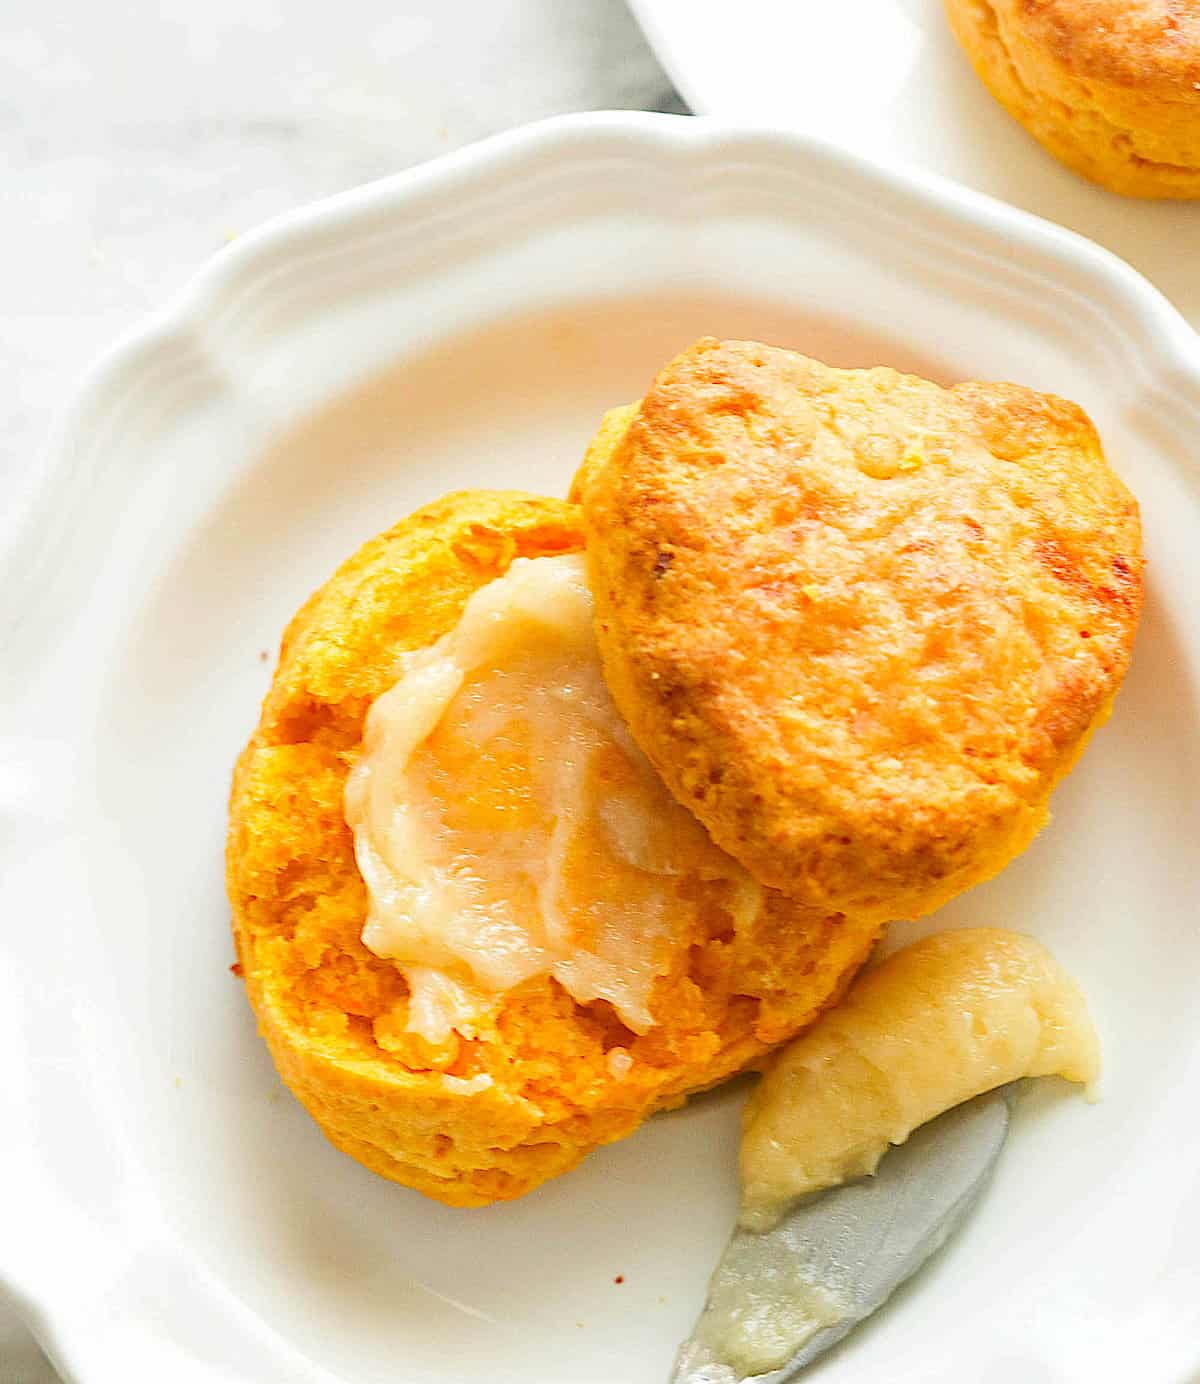
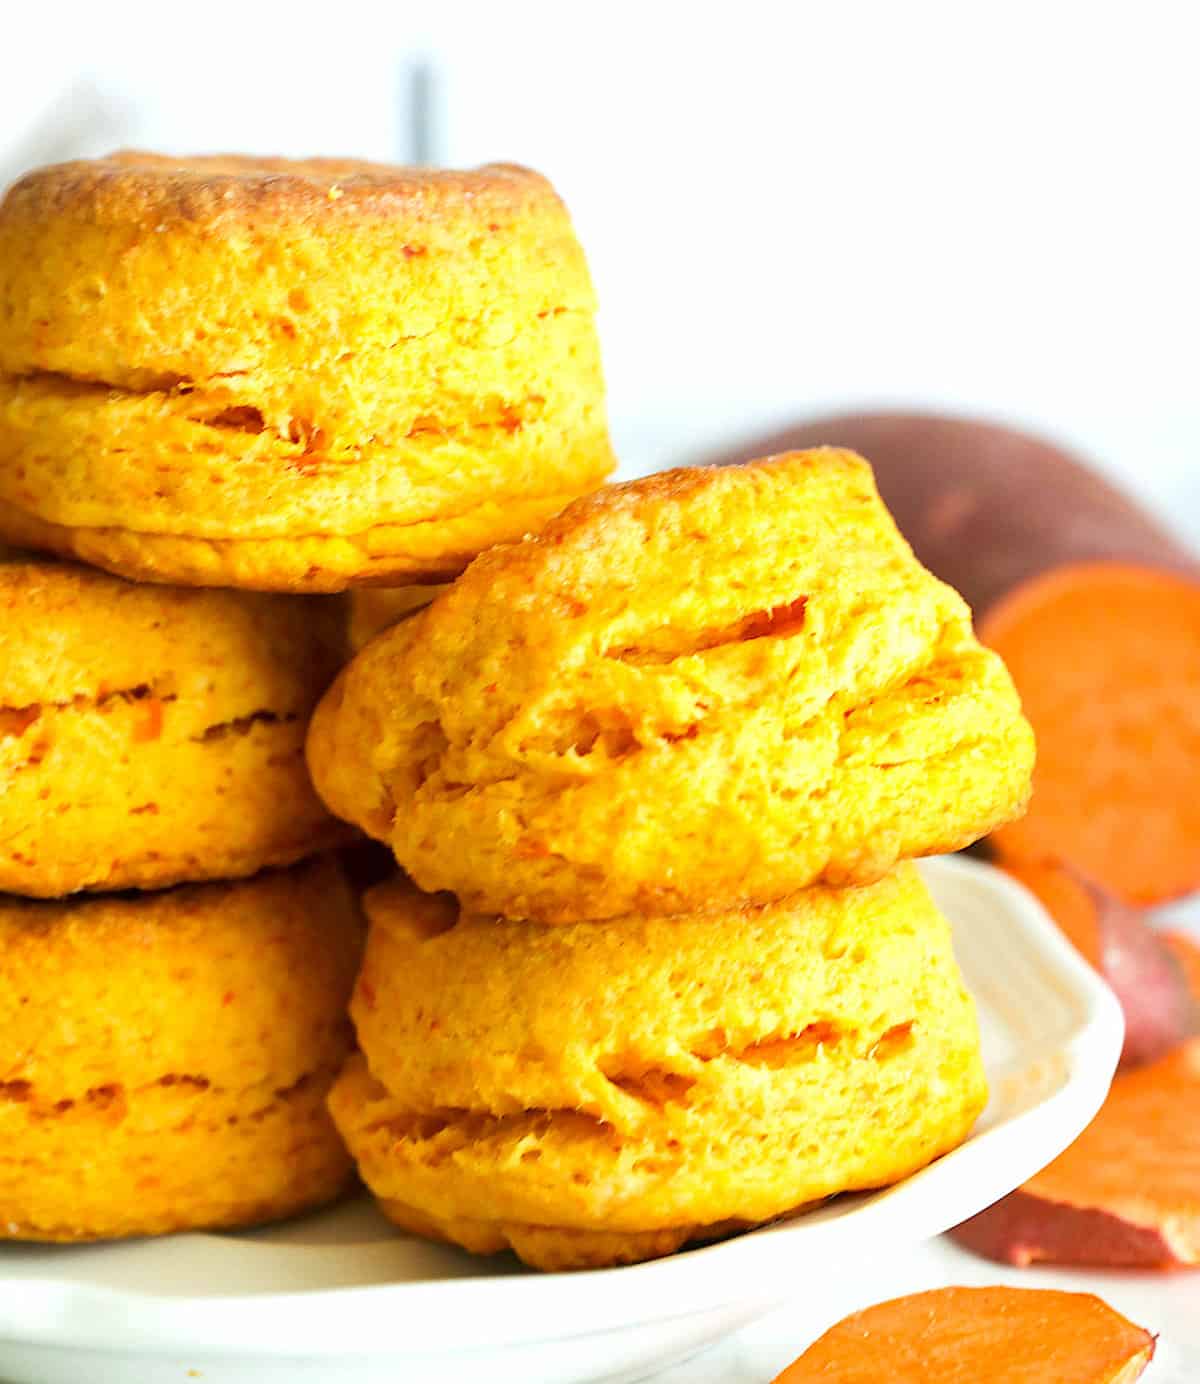
Bite into fluffy, steamy goodness fresh out of the oven, with these sweet potato biscuits. These golden beauties are a fantastic spin on a classic Southern recipe that your whole family will love. Trust me when I say there will be no leftovers.

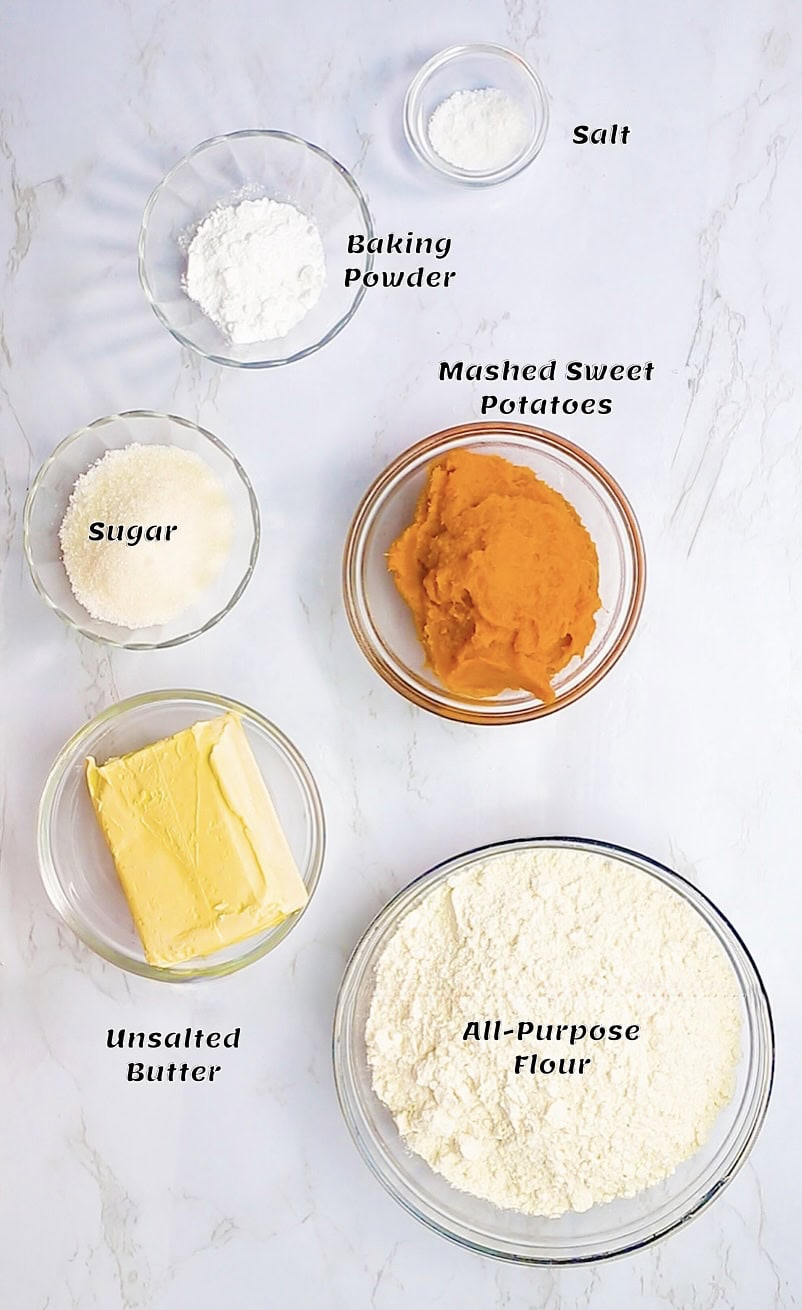
As usual, a little Southern thrift turned a classic recipe into something equally amazing. Regular biscuits usually call for milk or buttermilk, which are perishable and sometimes expensive. Instead, this sweet potato biscuit recipe calls for sweet potatoes – a root vegetable that is cheap and abundant, not to mention flavorful.
Now, just because this is a thrifty recipe doesn’t mean it skimps on flavor. Honestly, this easy recipe for sweet potato biscuits is one of my favorites! It only calls for six ingredients, you can whip it up in a flash, and the biscuits turn out ultra-moist with an incredibly delicious, earthy flavor that is second to none.
How to Enjoy Sweet Potato Biscuits
There’s no right or wrong answer here. I love to make this sweet potato biscuit recipe as a side to savory meals like roast turkey or baked chicken. But they work well with just about any meal you want to serve bread with. But I also love to make these for breakfast. A hot cup of coffee and a warm sweet potato biscuit slathered in honey butter or homemade jam is a fantastic way to kick off the day if you ask me.
How to Make Sweet Potato Biscuits
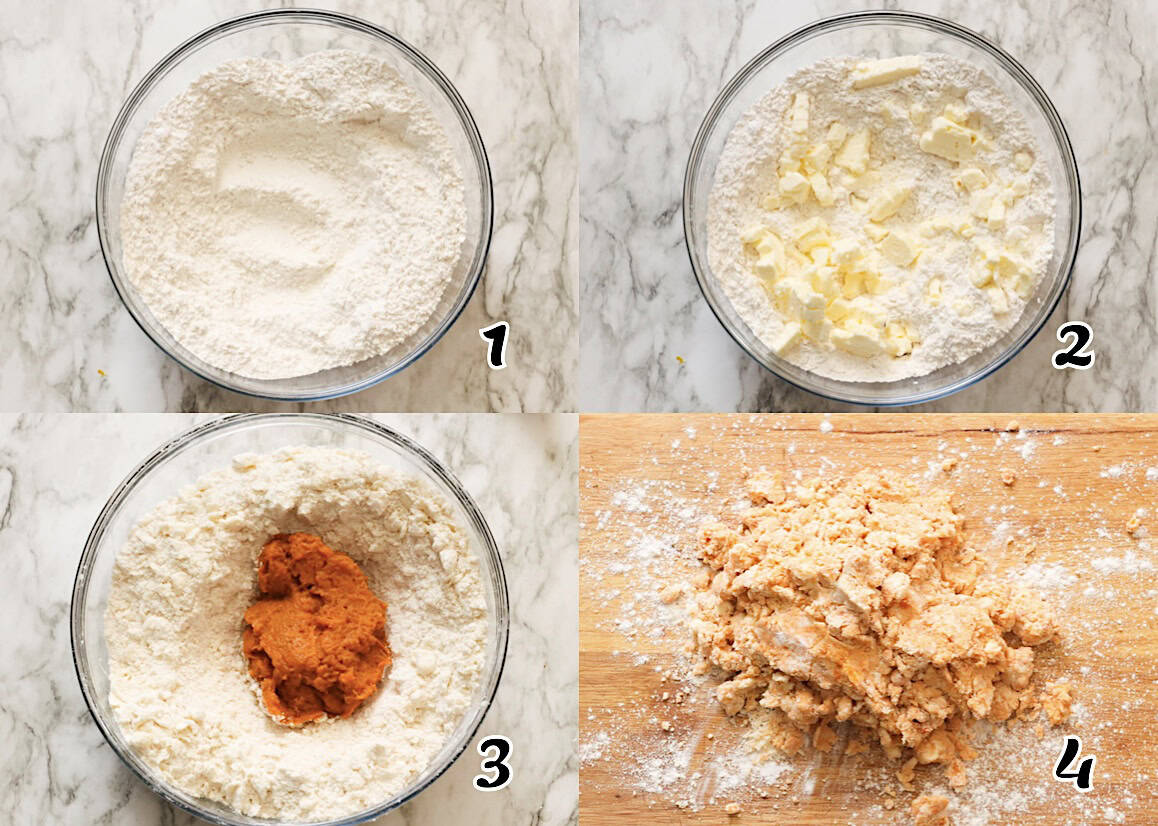
- Sift flour, baking powder, granulated sugar, and salt into a large mixing bowl. (Photo 1)
- Grate the frozen butter into the bowl of flour and work the dough until the flour is crumbly with pea-size chunks. Let the bowl rest in the fridge if there is any wait time between this step and the next. (Photo 2)
- Make a well in the center of the flour, add the mashed sweet potatoes, and stir until the dough barely comes together and looks a little flaky. Let it rest in the fridge for about 10 minutes while you prepare your surface for rolling out the dough. (Photos 3-4)
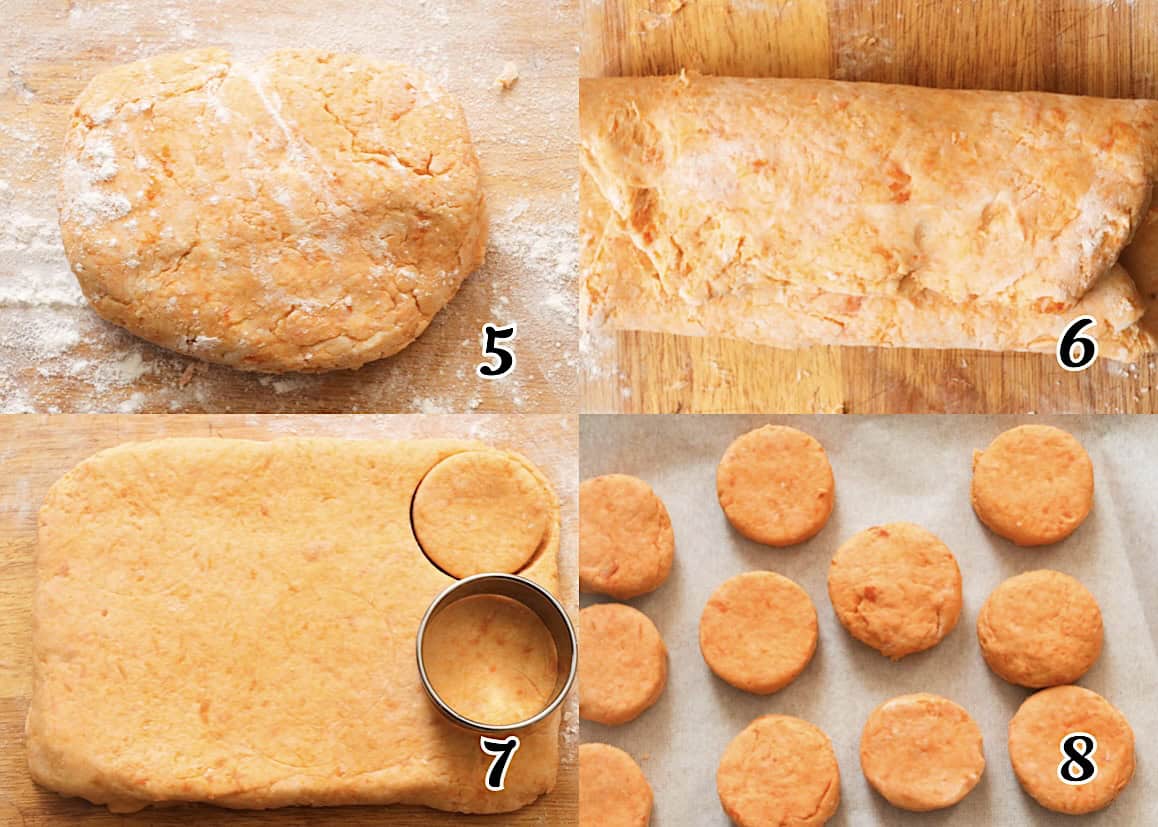
- Knead it 3-4 times – just enough for it to come together. You should still see flakes of butter in the dough, so be careful not to overmix it. (Photos 5-6)
- Roll it out to about ½” thickness. Fold the dough in half 6-8 times to ensure flakiness. Go easy on the rolling in the process. Pat the dough to about 1 inch thick. (Photo 7)
- Cut the biscuits out with a 2- or 3-inch round cookie cutter or a glass rim. Firmly push it straight down, then pull it up. Use your fingers to gently loosen the dough from the cutter and space them out evenly across your prepared baking sheet. (Photo 8)
- Repeat until all of the dough is used up. The scrap biscuits might not look as pretty as the rest, but they will pass the taste test. Lightly brush with buttermilk or cream if desired.
- Bake at 400℉ (205℃) for 12-15 minutes or until lightly browned. Brush them with melted butter, and enjoy.
Tips and Tricks
- Turn this recipe savory by omitting the sugar and adding cooked, chopped bacon for a fantastic breakfast biscuit.
- Make a fall-inspired version with a teaspoon of pumpkin pie spice.
- Freezing the butter and grating it into the dry ingredients ensures even fat distribution throughout the dough, making the biscuits light and fluffy.
- Let your biscuits rest for a few minutes after removing them from the oven before serving. This allows time for the crumb to set and will keep the biscuits light and airy when you cut them open or bite into them.
Make-Ahead and Storage Instructions
You can make these biscuits up to three days in advance. Store them in an airtight container at room temperature, then reheat them in a 350℉ (180℃) oven for about 10 minutes or microwave for about 15 seconds if you want them to taste freshly baked. Of course, they’re still delicious, even at room temperature.

What Goes With Sweet Potato Biscuits
Use them as a side with smoked turkey or roasted chicken, or add them to your Thanksgiving charcuterie board. These little biscuits never go unappreciated.
They also go great with breakfast foods. Serve them up with hot coffee and a Western omelet. So good!
More Melt-in-Your-Mouth Biscuit Recipes to Try
By Imma
This blog post was originally published in November 2022 and has been updated with additional tips and beautiful photos.
Leave a Reply